


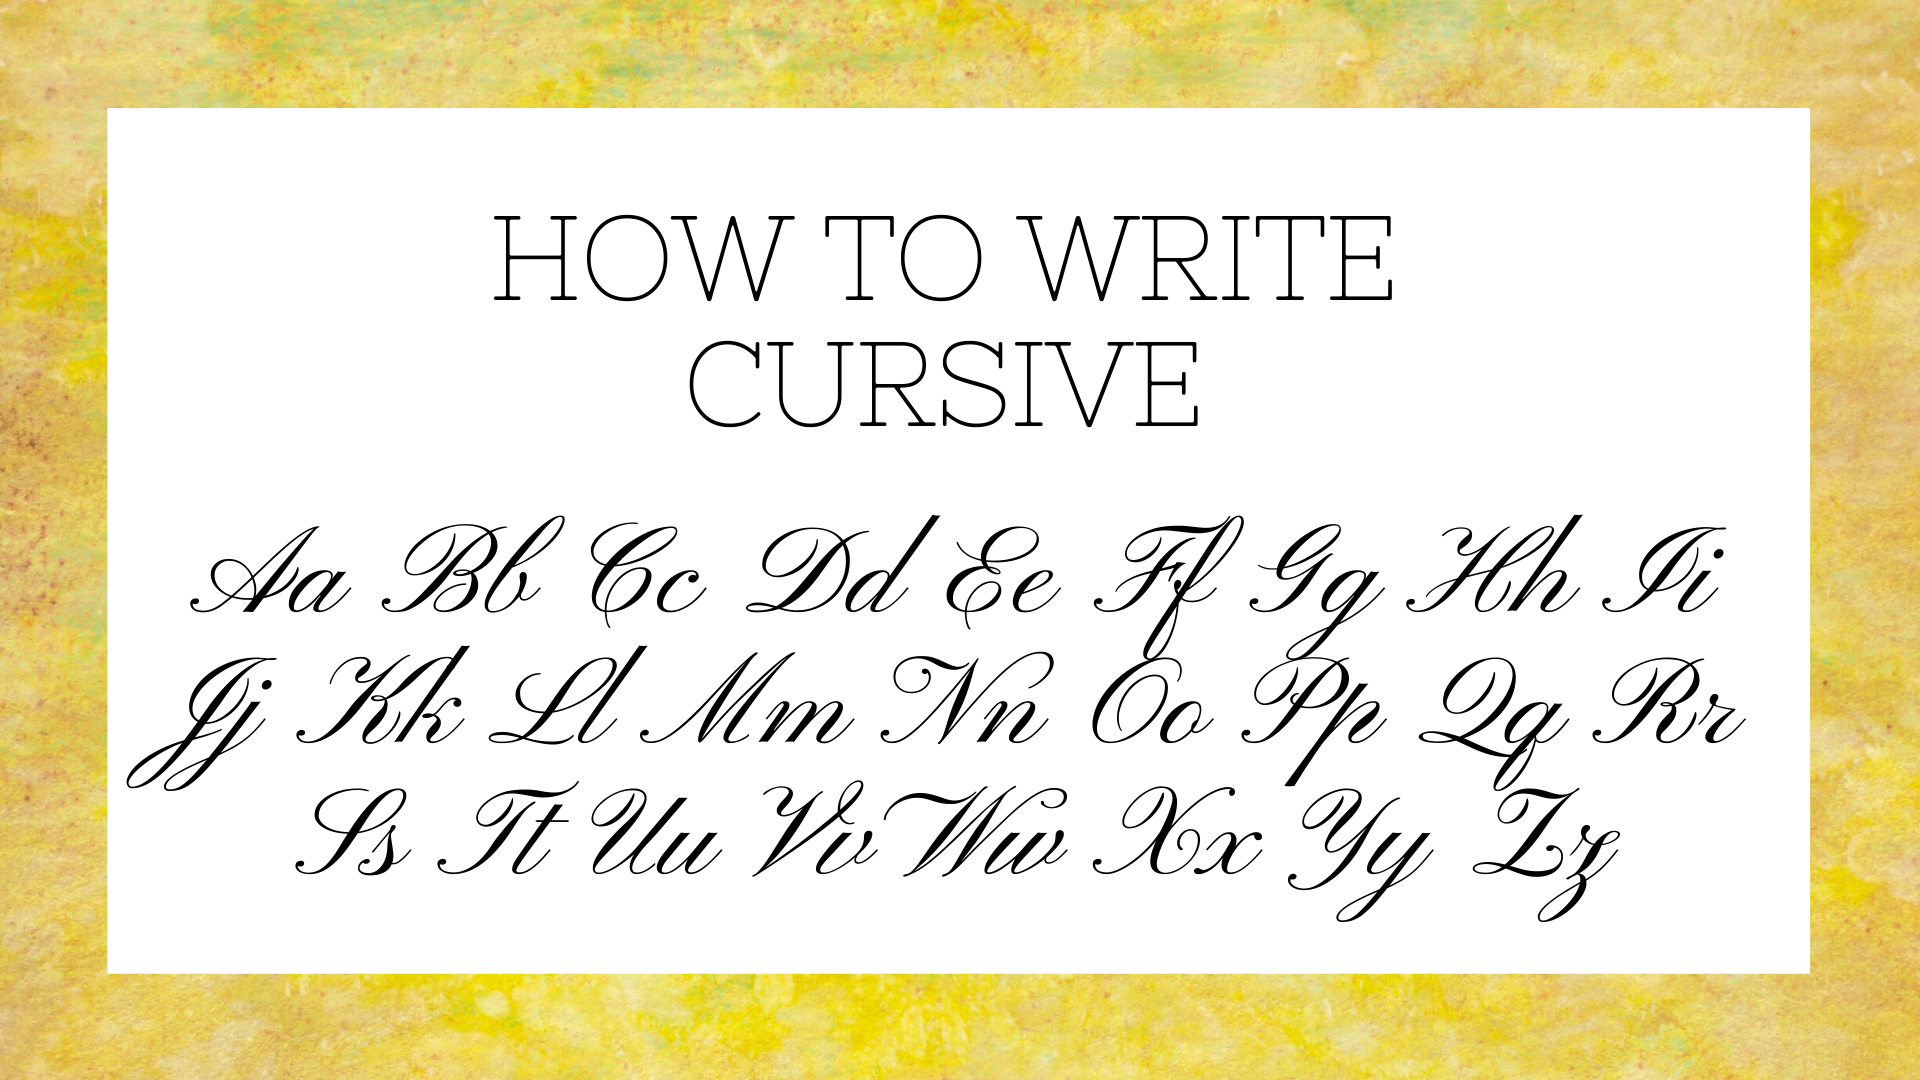
Cursive letters are a type of penmanship where each character is connected to one another through a looped or italicized writing style. In order to write cursive letters, you can practice using the worksheet below, learning how to connect words together in a flowing style.
In this day and age, many people hardly write by hand. The advent of word processing technology and its popularization among people of all ages thanks to computers, tablets, smartphones, etc. has meant, among other things, that most people now tend to type instead.
“I never did calligraphy… But handwriting is an entirely different kind of thing. It’s part of the syndrome of modernism… It’s part of that asceticism.” — Paul Rand
But, from time to time, most of us need to write by hand. For example, wedding invites. If you are interested in learning calligraphy and learning how to write cursive letters, you have come to the right place. In this article, we will tell you everything that you need to know and give you a step-by-step guide to writing cursive letters.
What Do I Need to Write Cursive Letters?
Before you make any attempt at writing cursive letters, you will need to make sure that you have everything that you need in order to do so.
Here is the full list of everything you will need:
- A pencil (it is up to you what kind because pretty much any pencil will do. Just choose one that you feel comfortable using if you can)
- An eraser (practice makes perfect. You will make plenty of mistakes on the way, so be prepared to deal with them)
- Black ink (make sure that you use waterproof ink)
- A pen holder
- A pointed tip pen nib
- Practice sheet
Once you have all of those things, you will be one step closer to learning how to write cursive letters.
Getting Started
The first thing you will need to do is make sure that you warm up before you make your first attempt at writing cursive letters.
Grab your practice sheet and then just trace a few upward lines. Start from the bottom line on your practice sheet and do an upward stroke until you reach the top line on the sheet.
For some reason when I write in cursive, it´s easier and flows better for me to read when I print. – Ashley Scott
Once you have practice your upwards stroke, you should try out the basic curve stroke between the bottom line and the dashed line. Again, do two or three of these.
Then, you should be ready to start with the lowercase alphabet.
Before you begin, take a look at the cursive script alphabet, and analyze the necessary strokes you will need in order to write each and every letter in them: some letters are written with upward strokes and others with downward strokes.
Upward Lowercase Letters
It is always a good idea to start with the upward stroke lowercase letters. In cursive script all the following letters begin with an upward stroke: b, f, h, I, j, k, l, m, n, p, r, s, t, u, w, x, y.
The difference is that some of them go all the way up to the top line, while others only go up to the dashed line. The letter f goes down below the bottom line.
Most lowercase letters need more than just one stroke, but for some letters, all strokes are upward while for others there will be a combination of upward and downward strokes. Just take your time and practice as much as you can with a pencil. You will most surely find that some letters will come a lot easier to you while others, more complex ones, will be harder.
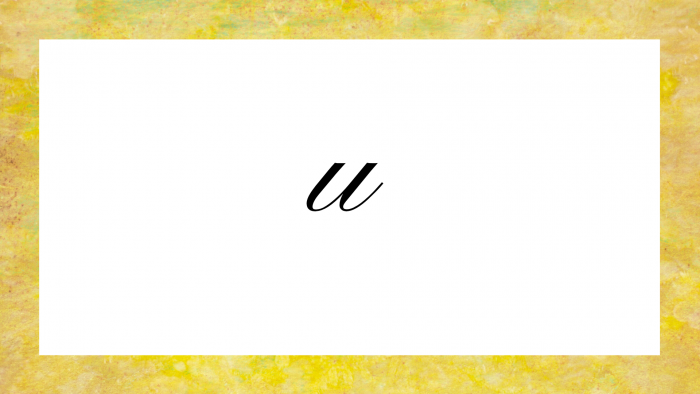
The best lowercase letter, to begin with, is the letter u. This is the simplest letter to write in cursive of them all. Just make a downward stroke to the dashed line, then go down to the bottom line, curving slightly before you reach it, then go back up and when you reach the dashed line go down leaving a little curl on the bottom line. Write the letter u several times until you get the hang of it. The letters I, j, m, n, r, v, w, and y are just variations of the letter u so learning how to do a cursive lowercase u will come in very handy later.
Once you feel confident with u, take things up a notch and attempt h. The first upward stroke should reach the top line. Then, you should arc to the left and go down all the way to the bottom line. Then arc up but just to the dashed line, finally a downward stroke to the bottom line and a slight curl.

Again, practice h until you get the hang of it. The letters b, f, k are very similar to it.
So, once you feel comfortable with u and h you should try the others that are similar to them.
Curved Stroke Lowercase Letters
The next set of letters you should practice then should be a, c, d, e, g, o, which are all curved stroke lowercase letters.
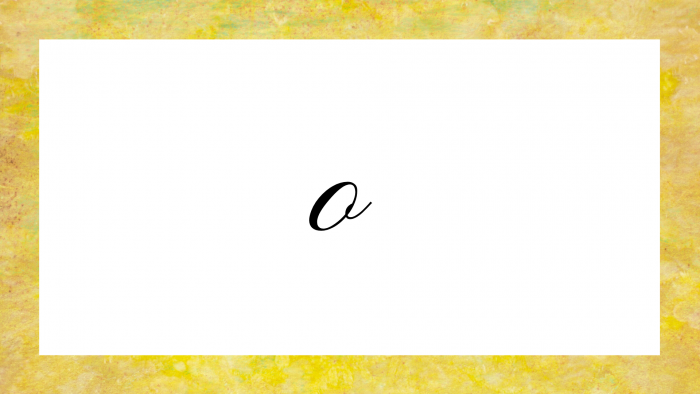
Begin with o, following the instructions that I laid out for the other letters above, and practice until you get the hang of it.
The next letter you should practice is g. The starting point is the same as o but after you reach the dashed line, you should make a downward stroke beyond the bottom line., then curl to the left and make a diagonal upward stroke.
Cursive Script Uppercase Letters
Once you have practiced all the lowercase letters and are confident with them, move on to the uppercase alphabet.
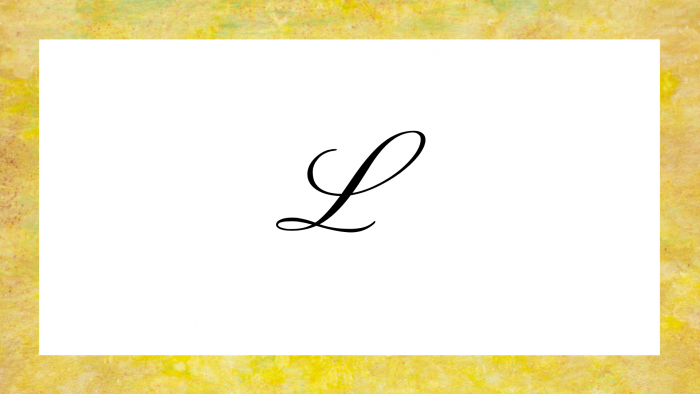
Begin with the letter L. This letter will then help with C, E, G, O, which are all similar to it.
Once you have L, C, E, G, O down you should try R. Uppercase R might take some practice but if you have reached this point, you will no doubt succeed at it if you do not give up. Start on the top line and then make a downward stroke all the way to the bottom line. From there, arc a little to the left and end in a curl. Then, lift up the pencil and put it on the dashed line. Make a curvy stroke upwards and go around to the left until you reach the top line. The make a curved stroke to the dashed line and, from there, another curvy stroke to the bottom line ending in a small curl.

With a bit of practice, you can turn your R into the uppercase letters B, D, F, I, J, P, and T.
And then, that is it! Once you have worked your way through the whole alphabet a few times you will be ready to put words together and create words and even whole sentences!
Related Posts
 Improving Tools For Quality Improvement: Crossings, Runs, And Crossrun
 Coherent Poly Propagation Materials With 3-Dimensional Photonic Control Over Visible Light
 Reconstructing Commuter Networks Using Machine Learning And Urban Indicators
 Surprising Internal Structure Of Whole Wheat-Green Gram Functional Bread
 Tailoring Tomatoes To Match Individual Consumer Needs
 Eavesdropping On “Classroom Talk” In Undergraduate STEM Classrooms